


Yes, HTML5 is more powerful than you may think it is. This post aims to provide a list of lesser known yet incredibly useful HTML tags and attributes that I've learnt and am currently using to improve my web dev workflow.
CAUTION : Things may not work as expected on older or all browsers. Most modern browsers will work though 🙂. If you want to check browser support of a particular feature, you can go to : caniuse.com
Here goes the list :
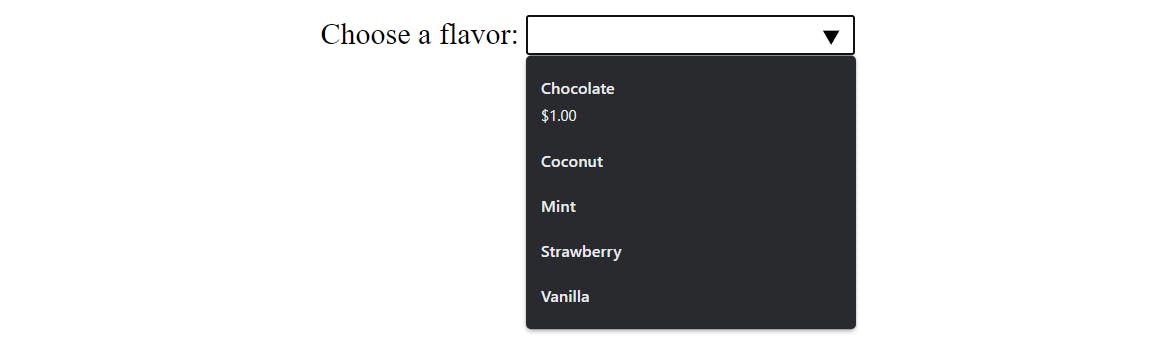
<datalist>tag helps you create autocomplete search boxes with predefined options and option values :
<label for="ice-cream-choice">Choose a flavor:</label>
<input list="ice-cream-flavors" name="ice-cream-choice" />

<datalist id="ice-cream-flavors">
  <option value="Chocolate">$1.00</option>
  <option value="Coconut">
  <option value="Mint">
  <option value="Strawberry">
  <option value="Vanilla">
</datalist>
output >
<dialog>tag creates a box component that can be used as a modal, alert or subwindow with proper javascript functions. By default dialog boxes are hidden and is only active with theopenattribute :
<!-- Simple pop-up dialog box containing a form -->
<dialog open>
  <form>
    <p><label>Favorite animal:
      <select>
        <option></option>
        <option>Brine shrimp</option>
        <option>Red panda</option>
        <option>Spider monkey</option>
      </select>
    </label></p>
    <menu>
      <button value="cancel">Cancel</button>
      <button value="confirm">Confirm</button>
    </menu>
  </form>
</dialog>
output >

<progress>and<meter>are two interesting HTML tags that shows a stylized progress bar and a scaler value within a range :
<label for="file">File progress:</label>
<progress id="file" max="100" value="70"> 70% </progress>

<label for="fuel">Fuel level:</label>
<meter id="fuel"
       min="0" max="100"
       low="33" high="66" optimum="80"
       value="50">
    at 50/100
</meter>
output >

<details>along with<summary>basically creates an accordion :
<details>
    <summary>Details</summary>
    Lorem ipsum dolor sit amet, consectetur adipisicing elit. Blanditiis
    maiores eligendi consectetur similique accusamus, amet magni totam
    non nesciunt illum impedit temporibus reprehenderit pariatur!
    Aliquid dolorum porro quaerat voluptates reprehenderit.
</details>
<details>
    <summary>Details</summary>
    Something small enough to escape casual notice.
</details>
details {
    border: 1px solid #aaa;
    border-radius: 4px;
    padding: .5em .5em 0;
}

summary {
    font-weight: bold;
    margin: -.5em -.5em 0;
    padding: .5em;
}

details[open] {
    padding: .5em;
}

details[open] summary {
    border-bottom: 1px solid #aaa;
    margin-bottom: .5em;
}
output >

<code>acts similar to the markdown syntax for indicating inline-code :
<p>The <code>push()</code> method adds one or more elements to the end of an
array and returns the new length of the array.</p>
code {
    background-color: #eee;
    border-radius: 3px;
    font-family: courier, monospace;
    padding: 0 3px;
}
output >

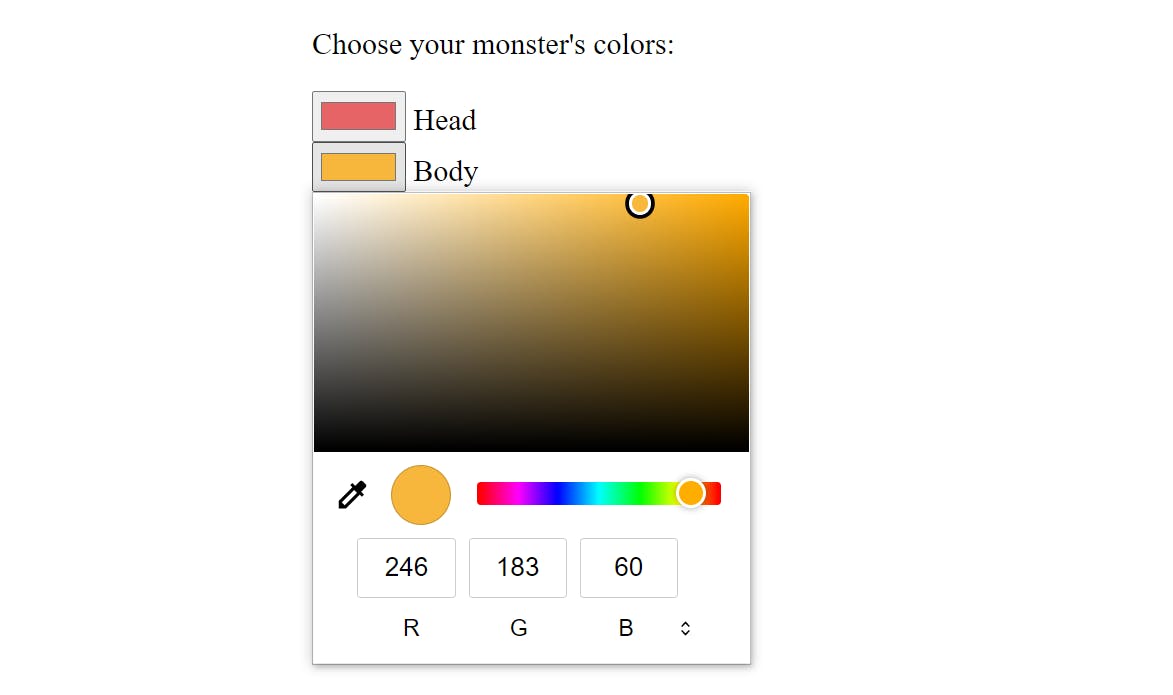
<input type = 'color'>creates a color picker and<input type = 'range'>creates a slider for a value input :
<p>Choose your monster's colors:</p>
<div>
    <input type="color" id="head" name="head"
           value="#e66465">
    <label for="head">Head</label>
</div>
<div>
    <input type="color" id="body" name="body"
            value="#f6b73c">
    <label for="body">Body</label>
</div>
output >
 and
and
<p>Audio settings:</p>
<div>
  <input type="range" id="volume" name="volume"
         min="0" max="100" value="50" step="10>
  <label for="volume">Volume</label>
</div>
output >

-
multipleattribute can be used for input type email and file for multiple comma seperated email inputs or multiple file selection :
<input type="email" multiple>
<mark>highlights a text within :
<p>Several species of <mark>salamander</mark> inhabit the temperate rainforest
of the Pacific Northwest.</p>
output >

<del>tag is used to indicate a text that has been deleted and<ins>tag is used to indicate a text that has been added :
<p>There is <del>nothing</del> <ins>no code</ins> either good or bad, but
<del>thinking</del> <ins>running it</ins> makes it so.</p>
del {
    text-decoration: line-through;
    background-color: #fbb;
    color: #555;
}

ins {
    text-decoration: none;
    background-color: #d4fcbc;
}
output >

contenteditableattribute lets the user edit the element in their browser :
<div contenteditable="true">
    <p>Edit this content to add your own text</p>
</div>
<abbr>tag indicates that the text within is an abbreviation and thetitleattribute value is shown as a tooltip when the user hovers their mouse over the abbreviation :
<p><abbr title="Cascading Style Sheets">CSS</abbr></p>
output >

<kbd>tag is used to denote keyboard keys. The content inside the tag uses monospace font by default. You can use styles on it to further improve the look :
<p>Press <kbd>Ctrl</kbd> + <kbd>C</kbd> to copy.</p>
kbd {
    background-color: #eee;
    border-radius: 3px;
    border: 1px solid #b4b4b4;
    color: #333;
    display: inline-block;
    font-size: .85em;
    font-weight: 700;
    line-height: 1;
    padding: 2px 4px;
    white-space: nowrap;
   }
output >

<optgroup>tag creates a grouping of options within a<select>element :
<label for="dino-select">Choose a dinosaur:</label>
<select id="dino-select">
    <optgroup label="Theropods">
        <option>Tyrannosaurus</option>
        <option>Velociraptor</option>
        <option>Deinonychus</option>
    </optgroup>
    <optgroup label="Sauropods">
        <option>Diplodocus</option>
        <option>Saltasaurus</option>
        <option>Apatosaurus</option>
    </optgroup>
</select>
output >

That's the end of my list. Thank you for sticking through the whole blog. I hope you've learned something new about HTML that you can use in your next project 😃. If you want to know more about HTML tags and attributes, please refer to - HTML Docs